GIF is a bad format, and you should still use it
Worth being honest about what you're working with. GIF was finalised in 1989, caps every frame at 256 colours, has no real transparency — a pixel is either fully opaque or fully invisible, which is why badly made GIFs have those jagged white halos — and compresses each frame in isolation instead of describing what changed since the last one. On pure technical merit it lost decades ago.
It survives because of where it works rather than how well it works. A GIF plays itself. No play button, no player, no codec negotiation, no autoplay policy to fight. It drops into an email signature, a Slack message, a Jira ticket, a README, a documentation page, a knowledge-base article — places where a video file is either unsupported or arrives as a grey rectangle with a broken play icon.
Here's the part nobody mentions: most of the "GIFs" you scroll past on social platforms aren't GIFs. Upload one to X, Reddit or Discord and it gets transcoded to MP4 on the way in, then played back on a loop with the controls hidden. The format is being used as an interface convention. Which gives you a clean rule — make a GIF when the destination needs one, and keep the MP4 when it doesn't. If you're posting to a social feed, upload the video; you'll get better quality at a tenth of the size.
What actually drives the file size
Four things, and they are not equally important:
| Setting | Effect on size | Cost to quality |
|---|---|---|
| Width | Huge — halving it removes about 75% | Low, if you weren't going to view it large |
| Length | Linear — twice as long, twice as big | None, if the extra seconds weren't earning their place |
| Frame rate | Linear — 24 FPS is double 12 | High below about 10 FPS — motion starts to stutter |
| Dithering | Varies — can add 20–40% | Depends entirely on the content (see below) |
Width first, always. It's the only control that buys a large saving without costing you much, because reducing it cuts pixels in both directions at once. Trim length second — GIFs are almost always longer than they need to be, and the first second is usually setup nobody needs. Only then touch frame rate, and stop at 10; below that the motion reads as broken rather than economical.
Rough starting points, though content matters more than any of these — a locked-off shot with a still background compresses enormously better than a handheld pan:
| Settings | Typical result | Good for |
|---|---|---|
| 320px · 10 FPS · 3s | ~1 MB | Email, chat, anywhere with tight limits |
| 480px · 12 FPS · 4s | ~2–4 MB | The default for most things |
| 640px · 15 FPS · 5s | ~8–12 MB | Documentation, when detail matters |
| 960px · 24 FPS · 6s | 25 MB+ | Almost nothing — use a video |
The size estimate above updates live as you change settings, so you can find the edge of your budget before spending time on a conversion.
Dithering: the setting to turn off
Most guides tell you to enable dithering and leave it there. That's half right, and the missing half costs you file size on the exact clips where size is tightest.
Dithering fights the 256-colour ceiling by scattering pixels of two available colours to fake a third, the way newspaper photos fake grey with black dots. On filmed content — faces, skies, sunsets, anything with smooth tonal transitions — it's essential. Without it, gradients collapse into ugly stripes of flat colour.
On flat-coloured content it's actively harmful. Screen recordings, app demos, UI walkthroughs, cartoons, line art and diagrams are mostly large areas of identical colour, and GIF compression is built to collapse runs of identical pixels. Dithering replaces those clean runs with a fine scatter of noise, so the compressor has nothing to pack down. You get a bigger file that also looks grainier than the clean version would have.
Filmed through a lens → dithering on. Rendered by a computer → dithering off. When you're not sure, generate it both ways and compare — it takes seconds and the difference is often dramatic.
Why the palette pass matters
Video conversions here run a two-pass palette. The first pass looks at your entire clip and works out the single best 256 colours to represent all of it; the second renders every frame against that fixed palette.
The alternative — which plenty of online converters still do — is choosing colours frame by frame. Each frame gets a decent palette in isolation, but the palette shifts as the clip plays, so colours crawl and pulse between frames. That shimmering, boiling look on cheap GIF sites isn't the format's fault. It's a missing first pass.
Screen recordings are the ideal case
The single most useful thing to make here is a short screen recording: a bug reproduction for a ticket, a feature demo in a pull request, a three-step how-to for a support reply. It's the case where GIF genuinely beats video, because those destinations often won't play a video at all.
It's also the case where GIF looks its best, since interface colours are flat and land inside 256 easily. Record the clip, then:
-
1Crop to just the part that matters A dialog box, not the whole 27-inch desktop. This saves more file size than every other setting combined.
-
2Trim ruthlessly Start at the click, end at the result. Cut the hunting-for-the-menu part.
-
310–12 FPS, dithering off Cursor movement stays readable at 10, and flat UI colour needs no dithering.
-
4Keep the width at native if you can Once you've cropped tightly, text stays sharp instead of turning to mush — and a cropped region is small enough to afford it.
Building a GIF from still images
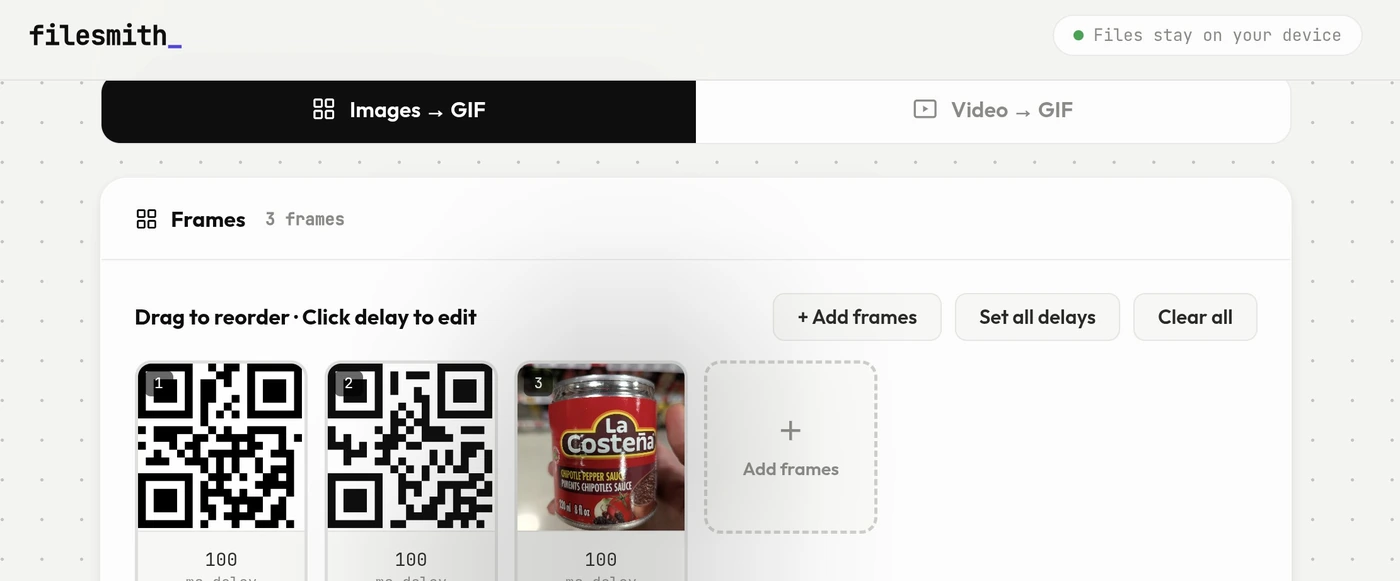
Images mode takes a set of stills instead of a clip. Drop them in, drag to reorder, and set how long each frame holds — per frame, not just globally, so a title card can sit for a second while the rest run at 100ms. Loop count is yours too: forever, once, or three times.
Useful for turning a series of screenshots into a walkthrough, animating a chart across time periods, showing a before-and-after as a two-frame flip, or assembling stop-motion from individual photos. Because you control each frame's timing directly, it's a better fit than video mode any time the pacing is deliberate rather than continuous.
Making one from a video clip
-
1Switch to Video → GIF and drop your clip MP4, MOV, WEBM, AVI or MKV. It loads straight from disk — nothing is uploaded.
-
2Set the trim range Drag the handles on the thumbnail strip, then use Play trim to watch exactly what will be converted.
-
3Crop, if the action is in one corner Drag a region over the preview. Cropping is the cheapest size saving available.
-
4Choose frame rate and width The estimate updates as you go, so you can hit a size target before converting rather than after.
-
5Generate, preview, download FFmpeg runs locally to build the two-pass palette GIF. Watch it loop, and use Adjust & Remake if a setting needs another go.
Larger clips take a moment — the conversion is happening on your own processor rather than a server farm, which is the trade for your video never leaving the machine. Screen recordings and phone clips are often the sort of thing you'd rather not upload anywhere, and here you don't have to.